In today’s fast-paced construction industry, efficiency and sustainability are paramount. One innovative solution gaining popularity is the use of sandwich panels. These versatile building materials offer excellent insulation properties and structural strength.
If you’re planning to use sandwich panels in your project, this comprehensive guide will walk you through the installation process, and you can get to know how to install sandwich panels.
From preparation to finishing touches, we’ve got you covered.
What Is Sandwich Panel?

Before diving into the installation process, it’s essential to understand the composition of sandwich panels. The core material provides insulation, while the outer layers protect the structure from external elements. These panels are ideal for various applications, including roofing and wall cladding.
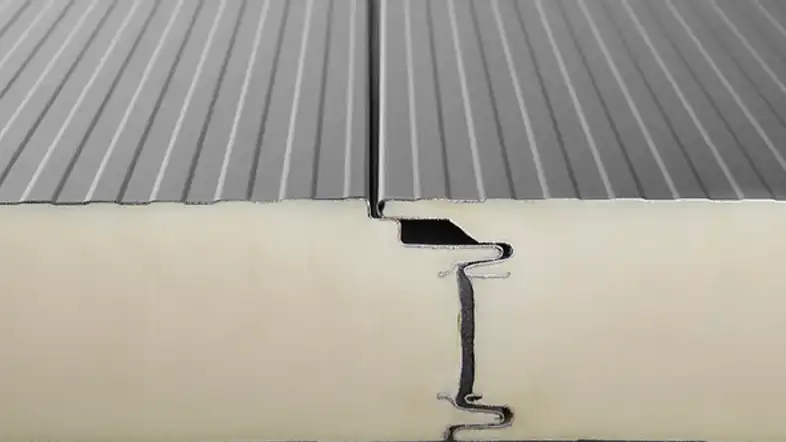
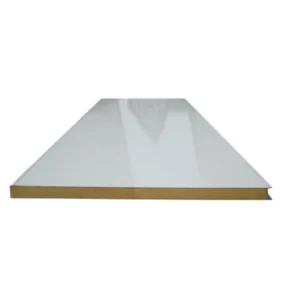
A sandwich panel, often referred to as a composite panel, is a construction material consisting of three layers: two outer layers and a core material. These panels are commonly used in various building applications due to their excellent insulation properties, structural strength, and versatility.
Here’s a breakdown of the components of a sandwich panel:
- Outer Layers: The outer layers of a sandwich panel are typically made of durable materials such as metal sheets, aluminum, or steel. These layers provide protection from external elements, including weather and environmental factors. They also contribute to the panel’s structural integrity.
- Core Material: Sandwiched between the outer layers is the core material. This core can vary in composition and may include materials like insulating foam, mineral wool, or other lightweight yet sturdy substances. The core material primarily serves as an insulator, helping to maintain comfortable temperatures inside buildings by reducing heat transfer.
The combination of these three layers creates a “sandwich” structure, which is where the name comes from. Sandwich panels are known for their energy-efficient properties, making them ideal for applications in construction, such as roofing, wall cladding, and even flooring.
These panels offer several advantages, including thermal insulation, soundproofing, and ease of installation. They are widely used in both residential and commercial construction projects, contributing to energy efficiency and sustainability in the building industry.
-
 EPS/PU/Rock Wool /Honeycomb Sandwich Panel Modular Cleanroom for Wall/Ceiling/Pharmaceutical/Food/Laboratory
 -
 50mm/75mm/100mm/150mm PIR/Rockwool/PU/EPS/Aluminum Honeycomb/Paper Honeycomb Cleanroom Panel
 -
 50mm PPGI Rockwool Sandwich Wall Panel Modular Cleanroom for Food Workshop with CE
 -
 Clean Room Sandwich Panels
How to Install Sandwich Panel?

here is a detailed step-by-step guide on how to install sandwich panels:
Step 1: Gather Your Tools and Materials
Before you begin the installation process, make sure you have all the necessary tools and materials at hand. Here’s what you’ll need:
- Sandwich panels
- Adhesive and sealant
- Fasteners and screws
- Cutting tools (e.g., a circular saw or jigsaw)
- Safety gear (gloves, safety goggles, masks)
- Ladders or scaffolding
- Measuring and leveling equipment (e.g., a measuring tape, spirit level)
Step 2: Ensure Safety Precautions
Safety should always be a top priority during any construction project. Ensure that you and your team are well-versed in the use of safety equipment, including gloves, goggles, and masks. Follow all safety guidelines throughout the installation process.
Step 3: Prepare the Installation Site
Proper preparation is crucial for a successful installation. Follow these steps:
- Clean the installation area to remove any debris or dirt.
- Ensure that the installation surface is dry and free from moisture.
- Inspect the structure for any structural issues that need addressing before installation.
Step 4: Start Installing the Sandwich Panels
Now, let’s begin the installation process:
- Begin by attaching the first sandwich panel to the framework or structure. Place it at the desired starting point, ensuring it’s level and plumb.
- Use fasteners and screws to secure the panel to the structure. Make sure to follow the manufacturer’s guidelines for the appropriate fasteners and spacing.
- Continue this process, overlapping each panel over the previous one to create a tight and secure seal.
- Pay attention to the alignment and ensure that the panels are correctly positioned.
Step 5: Seal and Insulate
To enhance the energy efficiency of your structure, you’ll want to:
- Apply sealant between the joints of the sandwich panels. This helps prevent air leakage, which can compromise insulation.
- Ensure that the panels are properly insulated. Depending on the core material, you may need to take additional insulation steps.
Step 6: Trim and Cut
Customize the sandwich panels to fit corners, edges, and openings as needed:
- Use precise cutting tools, such as a circular saw or jigsaw, to cut the panels to the desired size and shape.
- Ensure that the cuts are clean and accurate for a professional finish.
Step 7: Fix Accessories
Install any necessary accessories, such as flashings, gutters, ridge caps, and corner pieces:
- These accessories provide extra protection to your sandwich panel installation and add to the overall aesthetics of the structure.
Step 8: Finish and Inspect
After installing all the panels, it’s time for the finishing touches:
- Inspect the entire installation for any loose panels, gaps, or imperfections.
- Make any necessary adjustments to ensure that the panels align perfectly.
Step 9: Regular Maintenance
Once your sandwich panel installation is complete, it’s essential to perform regular maintenance:
- Inspect the panels periodically for damages or signs of wear and tear.
- Address any issues promptly to maximize the lifespan of your sandwich panels.
By following these steps and paying attention to detail, you can successfully install sandwich panels in your construction project, benefiting from their insulation properties and structural strength.
How to Install Sandwich Panel Roofing

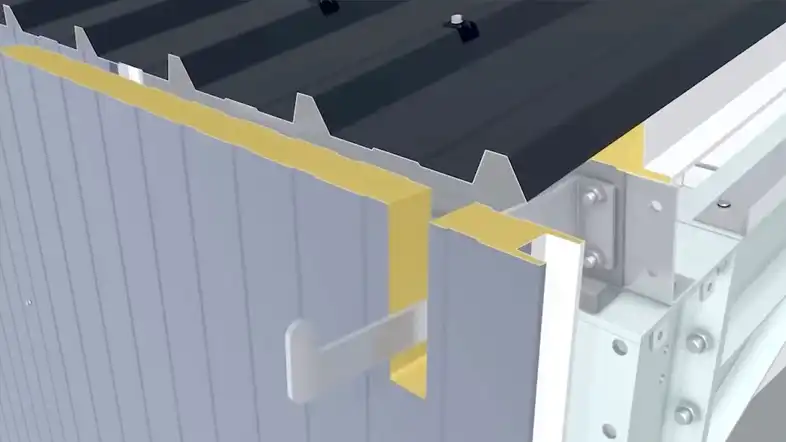
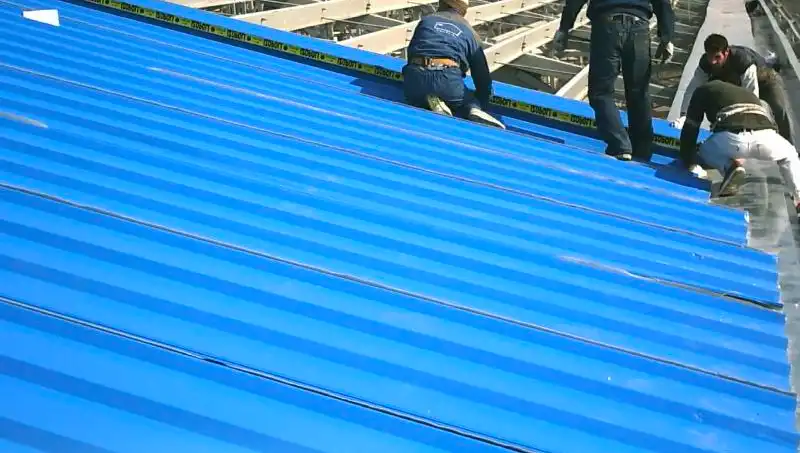
Installing sandwich panel roofing involves a series of steps to ensure proper insulation, waterproofing, and structural integrity. Below are general guidelines for installing sandwich panel roofing. Please note that specific installation methods may vary depending on the manufacturer’s recommendations and local building codes, so it’s essential to follow those instructions.
Materials and Tools You Will Need:
- Sandwich panels (with face sheets and insulating core)
- Roofing screws or fasteners
- Sealant or adhesive (compatible with the panel material)
- Flashing and ridge caps
- Roofing membrane or underlayment (optional)
- Roof trusses or supports
- Drills or screwdrivers
- Saw or cutting tools
- Safety equipment (gloves, safety glasses, etc.)
Installation Steps of Installing Sandwich Panel Roofing
Step 1: Preparation:
Ensure that the roof structure (trusses or supports) is properly installed and aligned.
Check that the roof surface is clean, dry, and free of any debris.
Install a roofing membrane or underlayment if necessary, especially in areas with high rainfall or where additional waterproofing is required.
Step 2: Layout:
Plan the layout of the sandwich panels, ensuring they are aligned properly with the roof structure and any openings (skylights, vents, etc.).
Step 3: Cutting and Trimming:
Measure and cut the sandwich panels to the required length using appropriate cutting tools. Ensure accurate measurements to prevent gaps or misalignment.
Trim the panels as needed to fit around roof features and edges.
Step 4: Fastening:
Position the first sandwich panel at one end of the roof structure.
Secure the panel to the structure using roofing screws or fasteners. Place the fasteners through the face sheets and into the underlying supports.
Continue installing panels in rows, ensuring they overlap correctly to create a watertight seal. Typically, panels overlap by a few inches or centimeters.
Step 5: Sealing:
Apply sealant or adhesive to the overlapping edges of the panels before securing them in place. This helps create a watertight seal and prevent moisture infiltration.
Step 6: Flashing and Ridge Caps:
Install flashing around roof penetrations and edges to prevent water intrusion.
Add ridge caps along the roof’s peak to seal the topmost panels.
Step 7: Inspect and Clean:
Inspect the installed panels for proper alignment, tightness, and sealant application.
Clean any excess sealant or debris from the roof surface.
Final Checks:
Check that all panels are securely fastened and sealed.
Ensure that the roof’s drainage system (gutters and downspouts) is functioning correctly.
Maintenance:
Regularly inspect the sandwich panel roofing for signs of damage, leaks, or deterioration. Address any issues promptly to maintain its performance.
It’s essential to consult the manufacturer’s installation guidelines and adhere to local building codes and regulations throughout the installation process to ensure safety and compliance. If you are not experienced in roofing installation, it is advisable to hire a professional roofing contractor for this job.
Safety Precautions
Safety should always be a top priority. Ensure that you and your team are well-versed in the use of safety equipment and follow all safety guidelines throughout the installation process.
Preparation Phase
Preparing the installation site is crucial. Clean the area, ensure it’s dry, and check for any structural issues. Proper preparation sets the foundation for a successful installation.
Installing the Sandwich Panels
Begin by attaching the first panel to the structure’s framework. Use fasteners and screws, ensuring a secure fit. Continue this process, overlapping each panel to create a tight seal.
Sealing and Insulation
To enhance energy efficiency, apply sealant between panel joints to prevent air leakage. Additionally, ensure that the panels are properly insulated to maintain a comfortable interior temperature.
Trimming and Cutting
Customize panels as needed to fit corners, edges, and openings. Use precise cutting tools to achieve a clean and professional finish.
Fixing Accessories
Install accessories such as flashings, gutters, and ridge caps to provide extra protection and aesthetics to your sandwich panel installation.
Finishing and Aesthetics
The final step involves finishing touches. Inspect the entire installation for any loose panels or imperfections. Make necessary adjustments and ensure that the panels align perfectly.
Maintenance Tips
Once your sandwich panel installation is complete, regular maintenance is essential. Inspect for damages or signs of wear and tear, and address any issues promptly to maximize the panels’ lifespan.
FAQs
How long do sandwich panels last?
Sandwich panels can last for several decades with proper maintenance.
Can I install sandwich panels myself?
While it’s possible, it’s recommended to hire a professional for a flawless installation.
Are sandwich panels environmentally friendly?
Yes, they are energy-efficient and contribute to reduced energy consumption.
Do sandwich panels require painting or additional finishing?
Typically, sandwich panels come with a pre-finished outer layer, but additional painting can be done for aesthetic purposes.
Can sandwich panels be used for residential construction?
Yes, they are suitable for residential and commercial applications.
Conclusion
Installing sandwich panels is a cost-effective and energy-efficient choice for modern construction projects. With the right tools, materials, and techniques, you can enjoy the benefits of insulation and structural integrity. Ensure you follow safety guidelines and consult professionals when needed to make your project a success.


